Monday, February 24, 2014

low fat whole wheat cinnamon rolls (no yeast required!)


I like to think I have pretty good self control. I don't buy shoes just because they're on sale. I make myself coffee at home every day instead of splurging at Starbucks. I avoid eye contact with the Reese's peanut butter cups as I'm checking out of the grocery store. 

But, we all have our weaknesses, and when it comes to the smell of warm, pillowy, cinnamon sugar goodness, I'm a goner. (Seriously, when I'm alone in an airport, I feel like I have to strategically plot my course to avoid any and all Cinnabons.)

In an effort to satisfy these cravings, and not end up missing a flight just to be found under a pile of empty Cinnabon containers, I had to find an easy, healthy, and quick recipe for cinnamon rolls that I could feel good about. These babies don't need any yeast, take about thirty minutes to whip up, and reheat like a dream. Basically, perfection. My self control thanks me. 


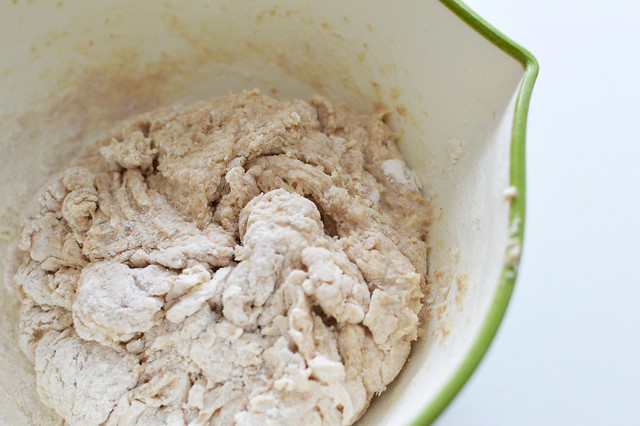
I will admit, things start out a little weird, but trust me on this one. Applesauce is cut into the flour mixture to get the dough started. You can use a pastry cutter for this, but I prefer to use two forks - the last thing I need is another kitchen gadget! Then, the almost-dough gets chilled for ten minutes.


This is a very handy time to get your cinnamon-sugar mixture together and get your butter melted for the filling. (Wouldn't be a cinnamon roll without it!)


With the addition of milk and vinegar, the dough comes together easily. I did 80% of the work in the bowl and finished the kneading off with my hands on the counter. Feel free to add a little more flour if your dough is too tacky. 


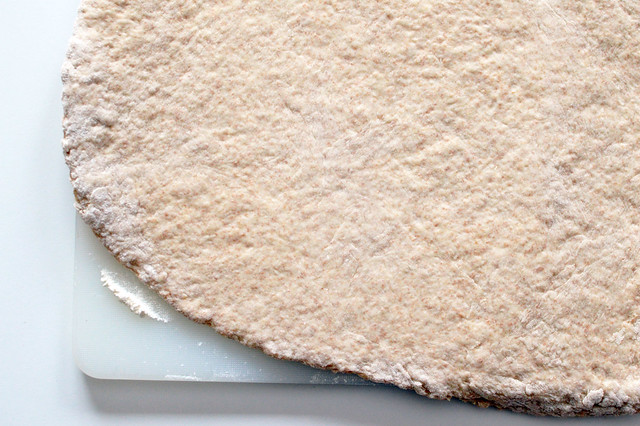
Once you get your dough rolled out to about a 1/2 inch thick, things started to get a little messy. At this point, you want to brush on the melted butter, sprinkle the cinnamon sugar mixture evenly, and roll the dough into a log. Once it's rolled up, you can even out any bulges - I find my middle to always get a little thicker than the rest. Then, slice your log into twelve even sections.


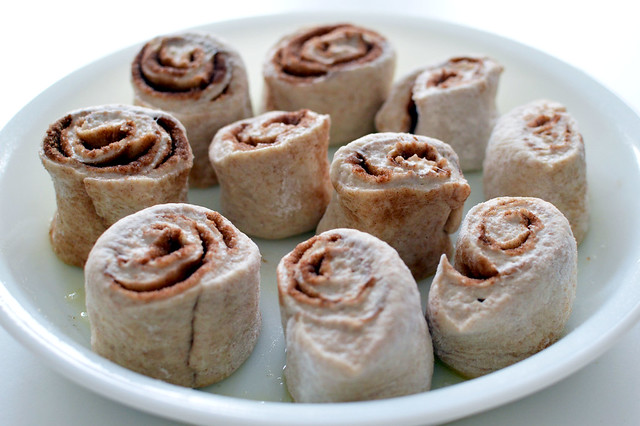
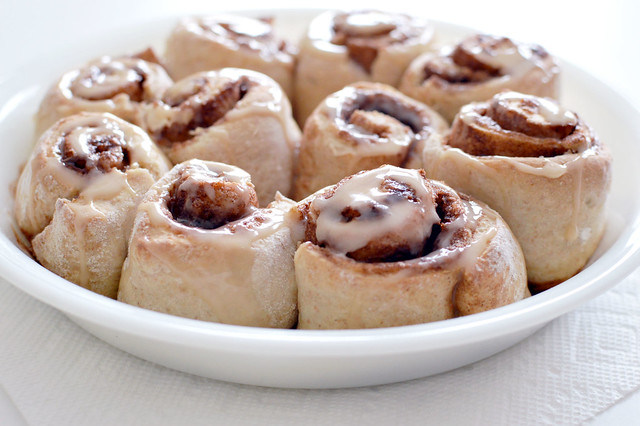
Okay, okay. You caught me. I totally said twelve, but only have ten. It was early and I was feeling generous! Either way, you want to make sure you space your rolls out so they have room to grow and bake all the way through.


When they come out of the oven twenty minutes later they will look so good even your kitten will want one. But, if you let them cool for a few minutes while you make a quick icing, they will be taken from "so good" to "life changer". 


And they totally are.


Healthy Whole Wheat Cinnamon Rolls (No Yeast Required!)
Yields 12 servings

Ingredients

1 cup all purpose flour
1 cup whole wheat flour 
2 1/2 teaspoons baking powder
1/2 teaspoon salt
5 tablespoons unsweetened applesauce (I used one small container)
1/2 cup skim milk (can substitute almond)
1 teaspoon white vinegar 
1 tablespoon butter, melted
4 tablespoons sugar 
2 teaspoons cinnamon

3 tablespoons powdered sugar 
1-2 tablespoons skim milk
1/4 teaspoon vanilla


Directions

1. Preheat oven to 400 degrees.
2. In a large bowl, combine flours, baking powder, and salt. Add applesauce and combine until shaggy. Chill in refrigerator for ten minutes.
3. Combine 3 tablespoons sugar with cinnamon and mix.
4. Melt butter and let cool.
5. Remove dough from refrigerator and add milk, vinegar, and remaining 1 tablespoon of sugar. Combine until dough comes together into a tacky ball. Remove from bowl and knead, adding extra flour if necessary. 
6. Roll dough into an oval shape, about 1/2 inch in thickness.
7. Brush on melted butter, sprinkle with cinnamon sugar mixture, and roll into a log. With a sharp knife, cut into 12 even sections.
8. Grease a pie pan and place rolled sections cut side down. Space evenly for even cooking.
9. Bake for 20-25 minutes or until puffed and golden brown.
10. While rolls cool, combine powdered sugar, milk, and vanilla. Pour over rolls and enjoy!

Note: These reheat fantastically in the microwave! 
Vegan Option: Substitute Earth Balance for butter and almond milk for skim.

Nutrition:

Calories: 111, Fat: 1g, Carbs: 25g, Protein: 3g

Happy baking!

Amanda

Saturday, February 15, 2014

healthy classic banana bread


I wouldn't say that I use baked goods to bribe people, but I do think there is a certain incentive to agree to a favor when there are, let's say, cookies involved. That's what happened a few weeks ago when I had the opportunity to photograph the National Cathedral and hoped to borrow some extra equipment from a friend. I generally shoot with a light body and a short lens, but I wanted a few back up options, knowing that I probably wouldn't get the chance to shoot from the rafters of the building again. In return, I promised a loaf of banana bread.

To be honest, my Mom is kind the banana bread guru in my life and I rarely make it myself. Nevertheless, I decided that having a healthy version in my arsenal wouldn't hurt, especially given how comforting a warm slice can be in the dead of winter when I'm dreaming of picking fresh fruit and dressing in less than three layers.

I took advantage of the snow day (fellow D.C.-ers, are you dug out yet?) and the super ripe bananas I had been waiting on to test out this lightened-up version of a classic quick bread. Embarrassingly, I doubled the butter needed to get this recipe started and decided it was a sign to just make a double batch! I ended up with a full loaf and twelve muffins, which means I've got snacks for the week. I believe the term "happy accident" would be appropriate here.


Quick tip: I keep my baking bananas in a brown paper bag with the top folded over. Science tells me that helps them ripen faster than just sitting on your counter due to gases being emitted and the concentration of said gases and other concepts that I just don't have room in my brain for. All I know is, it works.


Banana bread is great on its own, but walnut and chocolate chips really take it to the next level. I pulled out some unbroken walnuts to decorate the top and give it that professional "did YOU make this?" quality.


Once I had all my dry ingredients ready to go, I added the walnuts and chocolate and gave it a good toss in the flour mixture. I find the coating helps suspend them in the batter and helps avoid having a bottom layer consisting of chocolate and nuts. 


Also, since I live on the wild side, while most recipes call for you to really mash the bananas well, I like to be a little more gentle to I get pieces of fruit throughout the bread. (Okay, maybe I just really like mix-ins! You never want to share a pint of ice cream with me, unless plain vanilla is your thing.)


Since the loaf was a gift, you'll have to trust that the muffins adequately represent the perfect texture of this bread. (For those of you going the muffin route, they only take about 14-17 minutes in the oven!) 


The best part about banana bread? It really does get better over time. I find that it's best the second or third day, which makes it a great bake-ahead project.

Healthy Classic Banana Bread
Adapted from Cooking Light
Yields 14 servings

Ingredients:

1 cup whole wheat flour
1 cup all-purpose flour
3/4 teaspoon baking soda
1 teaspoon cinnamon
1/2 teaspoon salt
1/2 cup brown sugar
1/4 cup white sugar
1/4 cup butter, softened
2 large eggs
1 1/2 mashed ripe bananas (about 2 bananas)
1/3 cup 0% plain Greek yogurt (feel free to use honey, banana, or vanilla flavors)
1 teaspoon vanilla extract

Optional: 1/2 to 3/4 cup mix-ins

Directions:

1. Preheat oven to 350 degrees.
2. Cream butter and sugars together on medium speed, about one minute. Add eggs, one at a time, beating well after each addition.
3. Add banana, yogurt, and vanilla, and beat on medium speed until blended.
4. Sift or whisk together flours, baking soda, cinnamon, and salt.
5. Add dry mixture to wet mixture and combine on low until just blended. Do not over-mix! (I avoid this by letting my stand mixer do about 50% of the work, then mixing it the rest of the way by hand. Over-mixing leads to tough breads, which no one likes!).
6. Spoon batter into a loaf pan that has been greased with cooking spray and bake for 40-45 minutes, or until a knife speared through the center comes out clean.
7. Cool on wire rack for ten minutes, remove from pan, and let cool completely. 

Nutritional Information:

Calories: 165, Fat: 3.85g, Cholesterol: 39mg, Carbs: 28g, Fiber: 2g, Protein: 4.5g

(For comparison, Starbucks' Banana Bread has nearly 500 calories a slice!)

Monday, February 10, 2014

well, well, look who's back

You know when the world makes something so obvious it's hard to ignore? Yup, me too.

In the past week three interesting things have happened. First, I received a very sweet email from a reader (Hi, Michelle!) asking what had happened to me and my blog. Then, a friend from graduate school asked me if I could share a recipe of a photo I had posted on Instagram. Last, I found out that this little corner of the Internet still receives several hundred page views a day.

The kind email made me smile to myself and reminisce. The friendly request made me remember how much I love photographing and sharing useful and delicious recipes. But the last tidbit, the fact that people out there (you all!) are still clicking over here (to me!), really got me thinking.

I know a lot of dust has collected, 882 days worth to be exact, but I've missed this place and connecting with all of you. Plus, it would be downright rude of me to tune out life's very clear sign to get back to blogging, especially since I have kept baking and snapping (far less fancy) photos of the results. To prove it, a sampling of evidence below!


(White Chocolate Pistachio Biscotti, Whole Wheat Cinnamon Buns, Blueberry Muffins, and Gluten Free Almond Joy Pie)